Process Improvement
Request More InformationEvery process is only as good as the data that was used to set it up. Today, most processes related to PCB Assembly as well as other “recipe”-based, multi-step manufacturing processes use CAD data to program automated equipment.

The common assumption is that all of the parts coming together in these processes exactly match the CAD data. This assumption can be costly, given the fact that every part coming together for a process has additive tolerances and other issues that can dramatically impact throughput and finished piece quality.
The fact is, there are differences between the CAD data and the actual parts in process. Today’s automated machines work hard to allow for these variances, incorporate on-board vision systems to help take corrective action, etc.
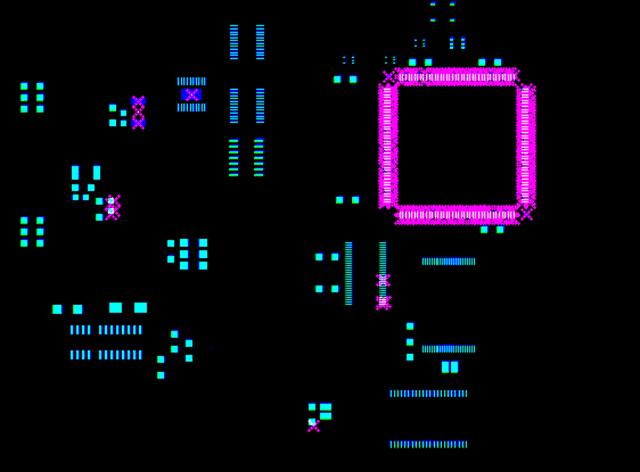
Simple common sense would be to “confirm” that all of the physical parts coming together do so properly, PRIOR to entering full production. This is easier said than done when considering today’s parts can have up to a million or more 25 um features on something the size of a sheet of notebook paper (i.e., a solder paste stencil for a semiconductor wafer). A 99.99% inspection isn’t acceptable. This means that there are potentially 100 errors in the one million features.
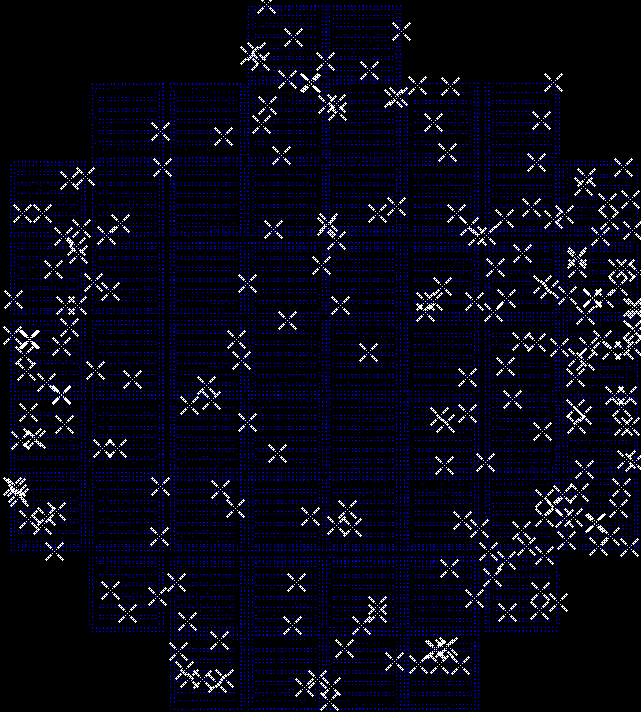
Actual Customer Example: The image below shows 102 errors in 342K features on a wafer bump stencil. This small error rate of 0.0003 is rendering over 90% of the parts defective!

ScanCAD’s process improvement services can look at each of the parts coming together, first to compare the part to the original CAD data, to see if they match and are in tolerance. Following that, we can adjust the CAD data to match the real-life parts to facilitate tighter production, mitigate defects and minimize additive tolerances.
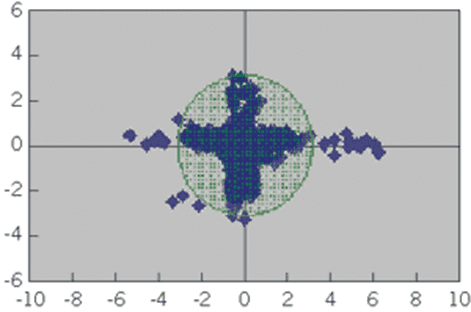
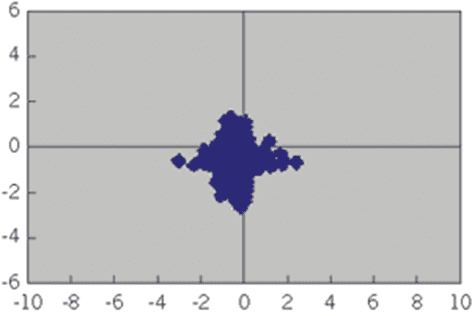
The following scatter chart from a published Motorola Study (SMT Magazine) shows such an adjustment for downstream processes. In this study, solder paste defects were reduced 43% in a 125,000 part study by simply adjusting the data used to fabricate a solder paste stencil to more accurately match the part on which the stencil was to be used. The scatter chart on the left shows the results of using the original CAD data to fabricate stencils for downstream production whereas the chart on the right shows the results of simply adjusting the stencil CAD data to better match the actual parts in production. Real parts don’t exactly match CAD data.


The same results are being documented when adjusting automated component placement machine data to better match the parts on which they are placing components. More accurate placements dramatically reduce placement defects such as tombstoning, etc.
It’s just common sense!
Using our Process Improvement service allows our customers to reduce rework & scrap by adjusting or tweaking CAD data to better match the parts in production.
News
Introducing the ScanCAD Software Assistant: Instant Answers, Anytime
We’re excited to announce a new addition to the ScanCAD support experience — the ScanCAD Software Assistant, now available within the customer portal on our website for all active warranty...
Celebrating Jeff Rupert and his role at ScanCAD
We are celebrating Jeff Rupert and his powerful role in shaping ScanCAD and what it is today, as well as where we are going as a company tomorrow. Jeff is stepping back from his full-time role into...
ScanCAD donates SMT system to Universidad Autónoma de Ciudad Juárez
Giving back is at the very core of what we believe to be important in our business. We always love to hear about the outcome following a donation or involvement and wanted to share a story from our...
Holiday Wishes 2025
Season's GreetingsTo the entire ScanCAD International global community, our friends, family, customers, representatives, and distributors. Thank you, sincerely, for another year — it is an honor and...
Honoring Our Legacy, Writing Our Next Chapter
It is with a profound sense of purpose and gratitude that I announce I will be transitioning from CTO to CEO of ScanCAD International, effective January 1, 2026. This moment is not a sudden shift,...
Is Your Manufacturing Process Ready for the Future of Electronics?
Is Your Manufacturing Process Ready for the Future of Electronics? The electronics manufacturing industry is facing a perfect storm of shrinking device sizes, increasing performance demands, and...
Trade shows
ScanCAD participates in many trade shows during the year, whether in ScanCAD's booth or by way of our distributor/OEM.
IPC APEX 2026
Anaheim, CA USA
March 17-19, 2026
ScanCAD Booth #3407
DMC 2026
Orlando, FL, USA
March 28 - April 2
ScanCAD Booth #128
